5 Fun and Practical Summer Crafts from Used Paper Packaging
June 11, 2025
No doubt, paper packaging seems to be a more eco-friendly solution when compared to its plastic counterparts. However, doesn’t it still feel wasteful to throw that perfectly fine bag or box right after just one use? Even though paper can be easily recycled, and breaks down in landfills over time, recycling takes up time and resources, while landfills take up space.
For that reason, we’ve selected some lovely craft ideas to help you upcycle used paper packaging into something new! Today, we’re exploring fun ways to stoke your kid’s creativity and transform used paper by creating lovely and stylish DIY projects.
1. Weave a Paper Bag Basket
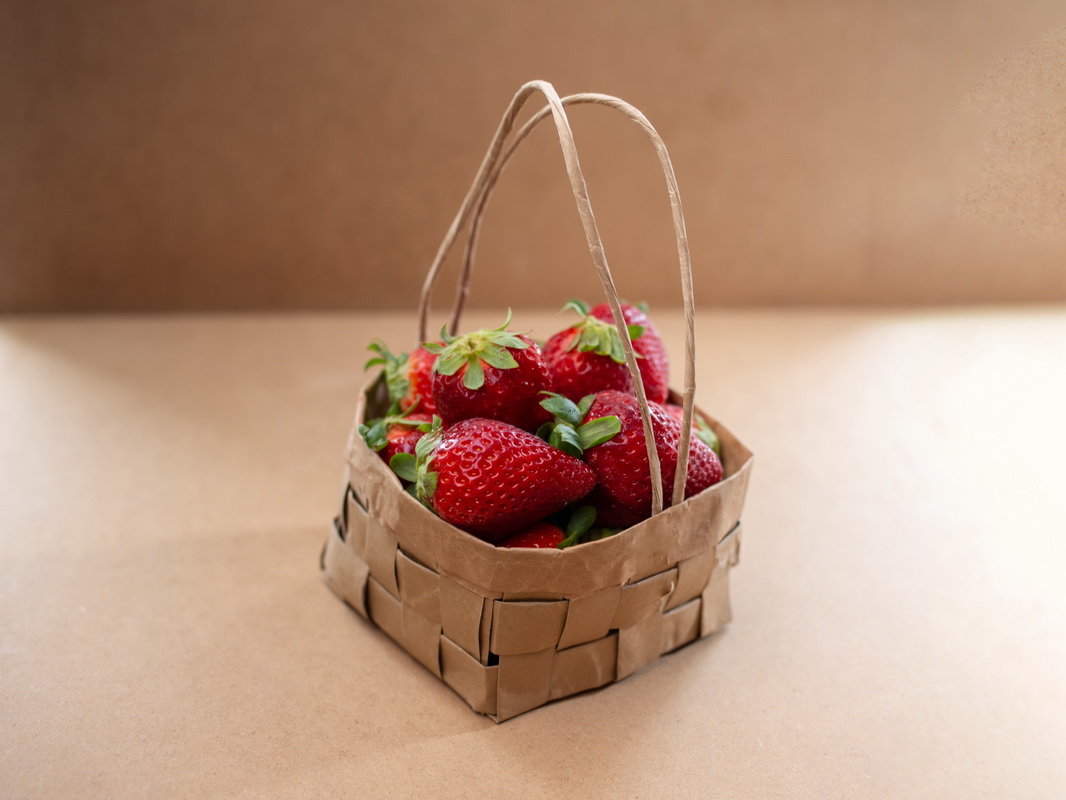
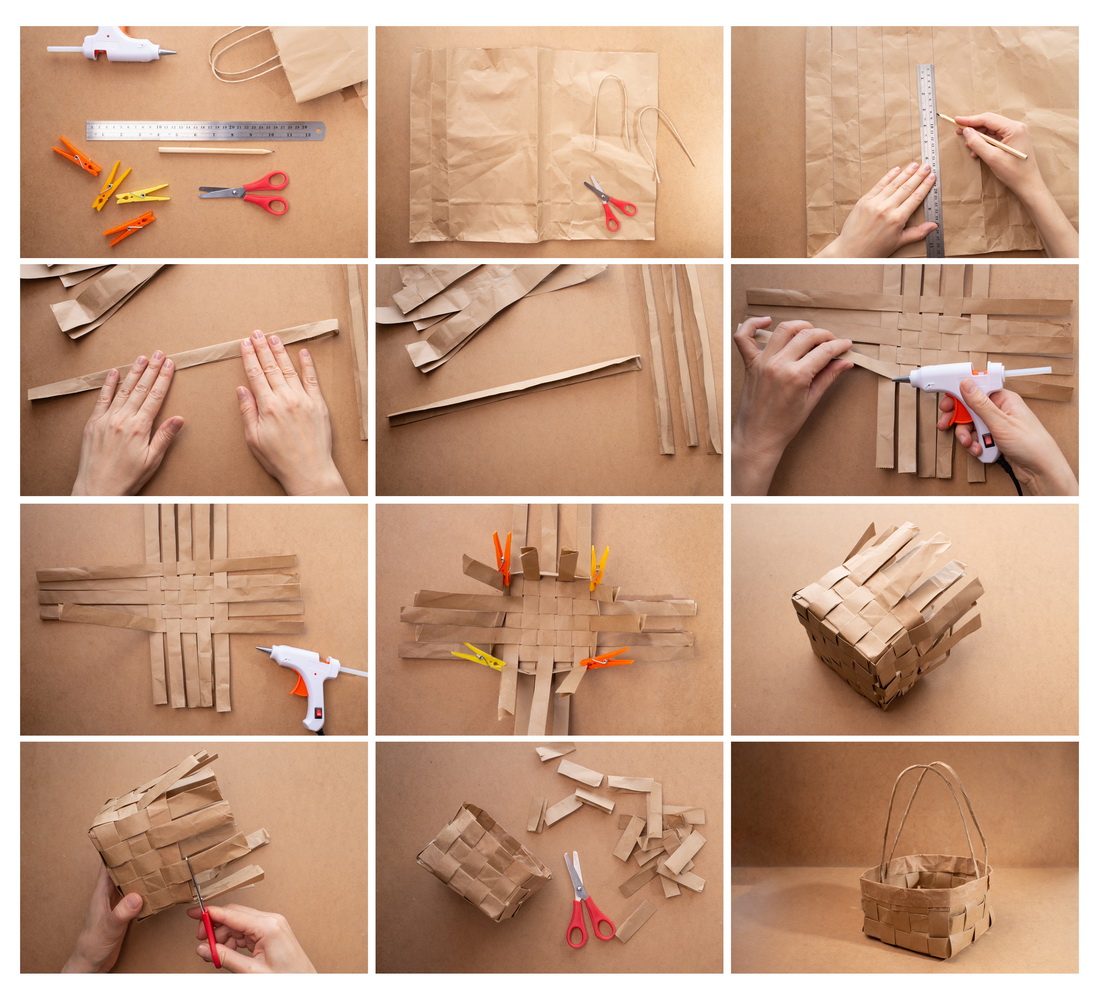
Weaving is a traditional craft that is kind of like solving a puzzle; you put multiple, pieces together following a specific pattern to create something whole. It's great to help kids practice their hand-eye coordination and fine motor skills. Gray paper will give your basket that lovely rustic look. And what makes it even cooler this handmade accessory has many uses around the house to store all kinds of things!
Materials Needed:
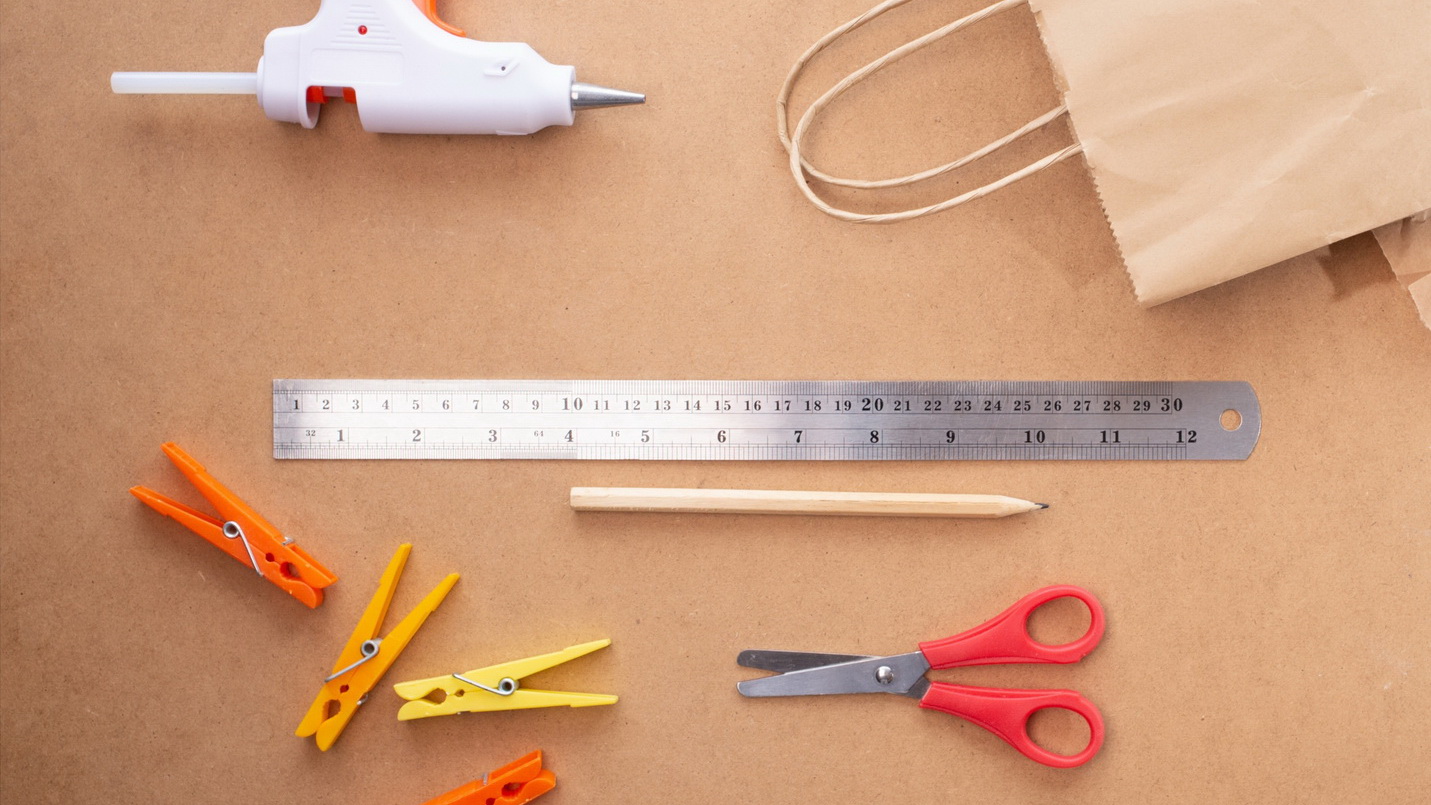
- Used paper bag, such as a grocery or gift bag
- Scissors
- Glue or double-sided tape
- Clothespins
- Craft twine (optional)
Get started by weaving the base that will serve as the basket’s bottom. To do this, simply cut long, even strips of paper and lay about half of them vertically on your workspace. Using the remaining strips, begin weaving them over and under the vertical ones. When the bottom is finished, use the clothespins to bend and hold the corner edges up to help you as you continue weaving up to form the sides of the basket. To finish the sides, bend the top strip down and glue or tape to create a finished look. Finally, make a handle using the twine, or feel free to use extra strips of paper.
2. Make a Paper Bag Puppet
A childhood staple, we all remember creating paper bag puppets out of lunch bags, and maybe even using them to write and perform a show! This time, instead of wasting unused lunch bags, find a used gift bag instead. What type of puppet will your kiddo make? Will it be an owl? A monster? An alien? With paper bag puppets, your child can truly make an intriguing cast of characters!

Materials Needed:
- Used gift bag or small paper grocery bag
- Markers
- Scissors
- Glue or tape
- Construction paper
- Any other craft supplies as desired, such as pom poms, googly eyes, feathers, etc.
Because paper bag puppets are as unique as your child’s imagination, there are no specific rules except that bottom of the bag becomes the head of puppet so that kids can insert their hands to move the head up and down. Feel free to draw face features, like eyes and noses or beaks, or use craft supplies like googly eyes and construction paper. Use markers to create a colorful and creative puppet!
3. Create Some Creepy, Crawly Paper Bugs
Thanks to online shopping retailers like Amazon, who doesn’t have a box or two lying around the house? It’s time to repurpose those boxes into cute, cardboard toys or decorations by creating some handmade creepy crawlies!
Materials needed:
- Used cardboard as from a shipping box
- Pencil
- Box cutter or craft knife (parental guidance is needed!)
- Hot glue gun
- Markers (optional)
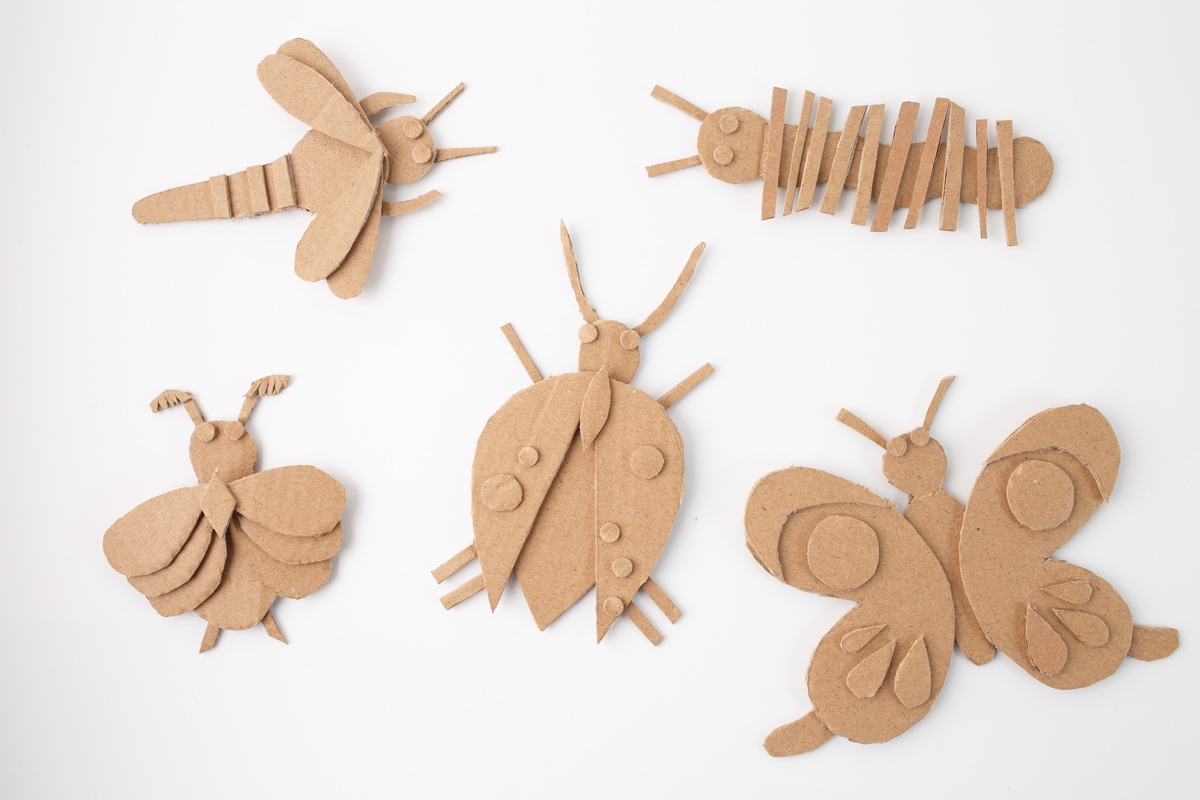
As shown in the images, these cardboard bugs are made by gluing together multiple pieces of bug body parts cut out of cardboard. To begin, decide what types of bugs to make and use a pencil to outline their bodies. For instance, just draw a head and thorax before cutting it out using a box cutter. Next, draw body parts to be included on each bug. Draw and cut out wings, antennae, eyes, and legs. Once all the parts are cut, glue them together to assemble each bug. Don’t forget to color them!
4. Build a 3D Wilderness
The best thing about cardboard is that it is sturdy enough to create 3D figures and doesn’t involve the level of skill needed to make origami out of paper. Your child will love spending hours making an entire wilderness complete with 3D trees, wolves, deer, and more!

Materials needed:
- Used cardboard
- Pencil
- Box cutter or craft knife
- Markers or paint
To begin, decide what types of animals and trees to create and trace them with a pencil. For both animals and trees create pairs of legs and stumps separately because these will join with the body of the figure to act as a stand. For trees, you may opt to draw the tree top separately from the trunk to make this portion 3D as well. Using a craft knife or box cutter, carefully cut out the figures, cutting slits on any portions that will attach to the bodies or trunks. Attach treetops and legs perpendicularly to make a stand for each figure. Encourage kiddos to decorate and arrange them to make an exciting scene!
5. Play a Matching Game with a Cardboard Paint Palette
Need a simple project for a toddler or preschooler? Help your little learner create an easy cardboard paint palette that can be used to find and match colors both indoors and out!
Materials needed:
- Used cardboard shipping box
- Pencil
- Scissors or craft knife
- Markers
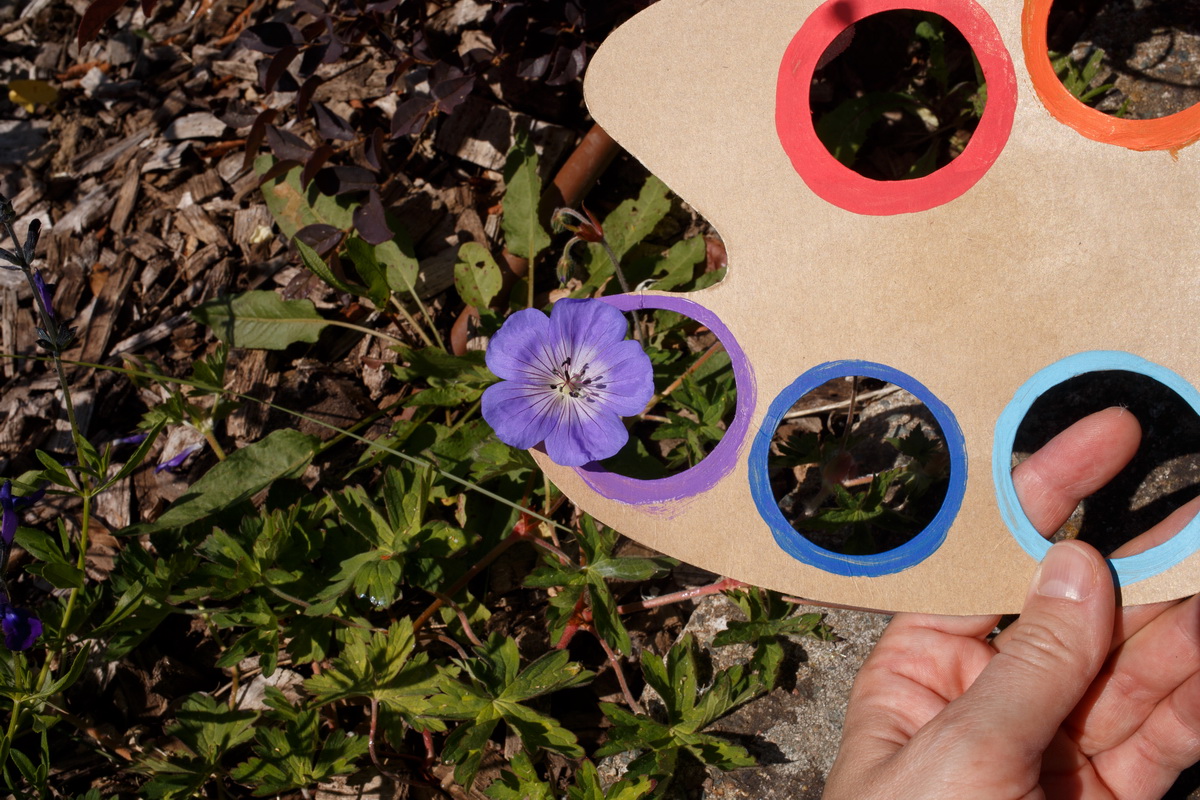
Using a pencil, simply draw a large paint palette on a piece of cardboard, drawing circles that will later be cut out. Take scissors or a craft knife to carefully cut out the palette before cutting out the circles as shown in the photograph. Encourage learners to choose marker colors to color the edges of each circle cutout. Use the palette as a viewer and challenge your learner to match the color of each circle to colors they can find in real life. Compare by centering the objects in the circle next to the colors.
This summer, paper packaging doesn’t have to go to waste! Each of the projects above will not only help you to be better stewards of the environment, but they offer quality time with your kids while giving them a creative outlet this summer.


